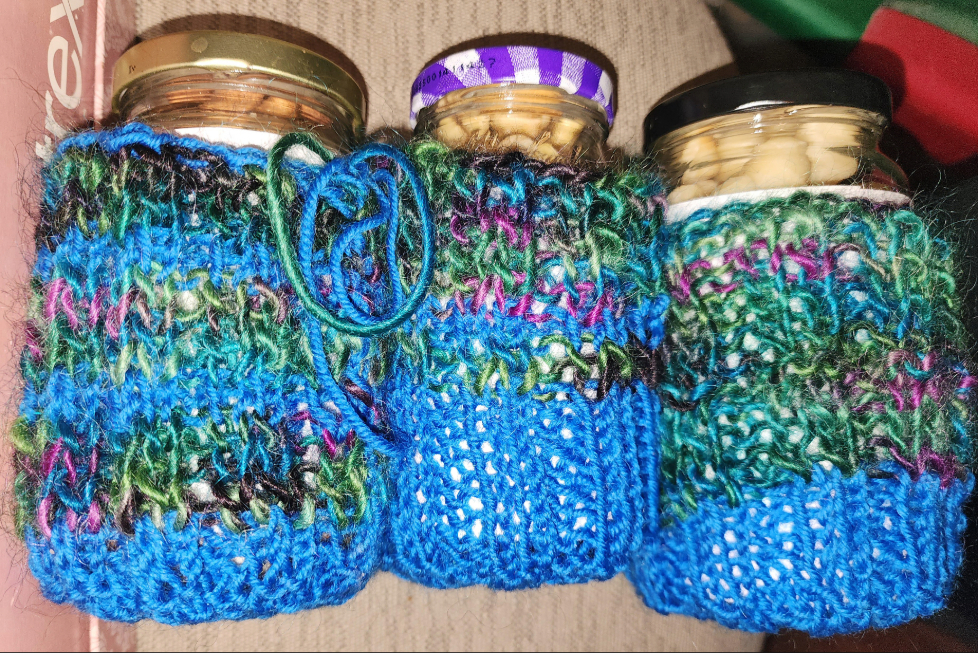
Here are some easy-to-make, inexpensive gifts: knitted cozies to wrap jars filled with treats.
My daughter’s daughters are both students; they have part-time jobs but no extra money (for buying gifts) or time (for making gifts). My daughter suggested that we have a “white-elephant” gift exchange of stuff we already have on hand, which we don’t mind giving away. My tiny granny flat doesn’t have room for anything extra, so I decided to cheat a little, adding a smidge of hand-crafting to my gifts. I used some empty jam jars, some yarn left over from other projects, some paper, and some nuts — nothing I bought (at least not recently!).

Figure 01. If you have about half an ounce of medium-weight yarn, an empty glass jar, some typing (or other) paper, and some nuts, candy, or other treats you don’t mind giving away, you won’t need to spend a dime on this gift.
Time
My first cozy took me about two hours: make my gauge swatch, make adjustments and calculations to the pattern, and then knit the jar cozy. My second jar cozy took about an hour, as did each of the remaining ones. A speedier knitter might be even faster than I was.
If you soak off the jar’s label, that will add a lot of time, but you can skip this step and simply cover the label with paper. Covering the jar and adding the filling takes very little time per jar.
Materials
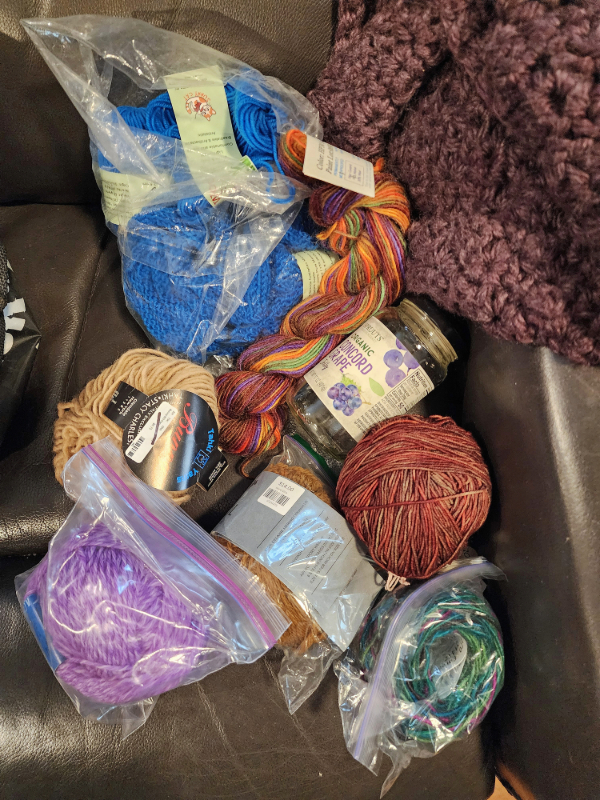
Figure 02. These are some of the yarns I considered using. One was too thick, so I dismissed it immediately. Then I looked for two similar-weight yarns that I thought might complement each other in texture and color.
- Yarn (a smidge more than half an ounce total)
- Two contrasting stretchy sport-weight or worsted-weight yarns (animal-fiber or blend; not cotton, linen, or other plant fiber) — such as a solid, smooth yarn and either a variegated yarn or a contrasting color or texture of yarn
- (See “Sources” at the end of this blog, for the specific yarns I chose)
- You could really just use one color of yarn, but it’s more festive with two; you could also go wild and crazy and switch yarns every row or two.
- Jars

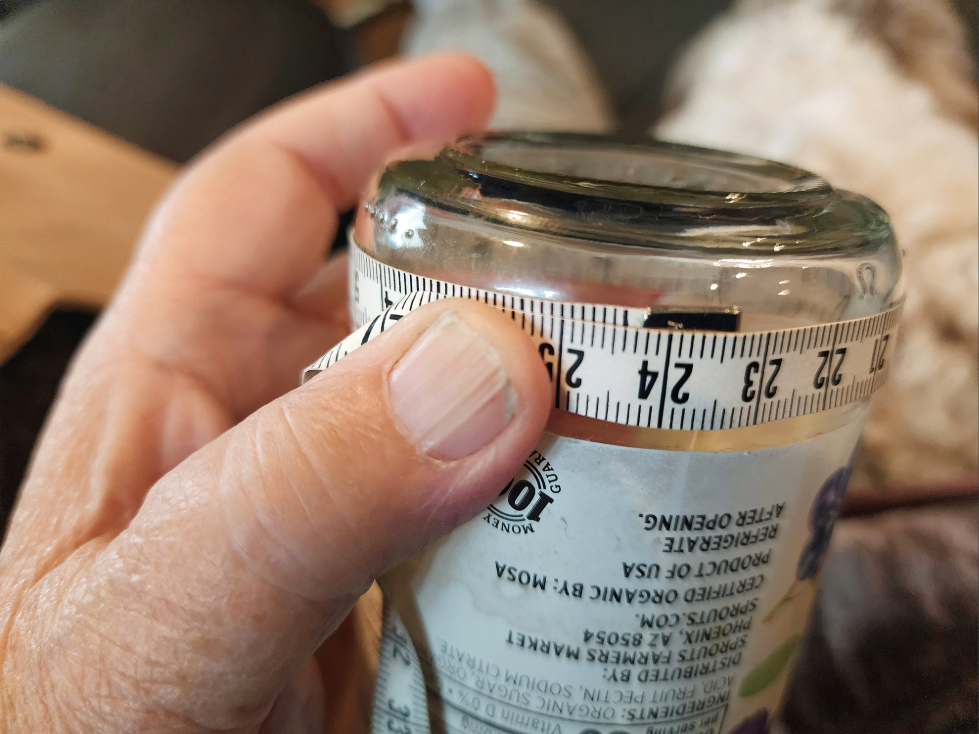
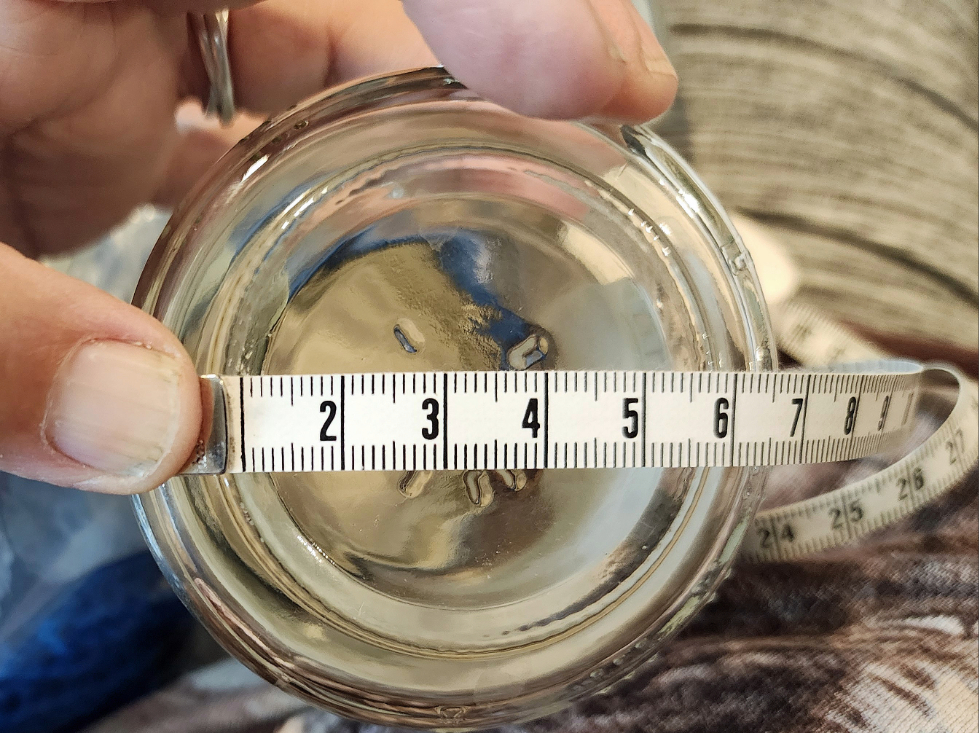
Figure 03. I used jam jars, which were 9.5″ / 23 cm circumference (around the sides); 2.5″ / 6.5 cm diameter (across the bottom); 3.5″ / 9 cm tall (up the side, enough to cover a label). You could really use almost any size of jar, as long as you have the yarn and the time to make the cozy.
- Paper, to cover either the label or the sticky stuff left on the jar after removing the label
- Tape, to secure the paper around the jar
Equipment
- Knitting needles
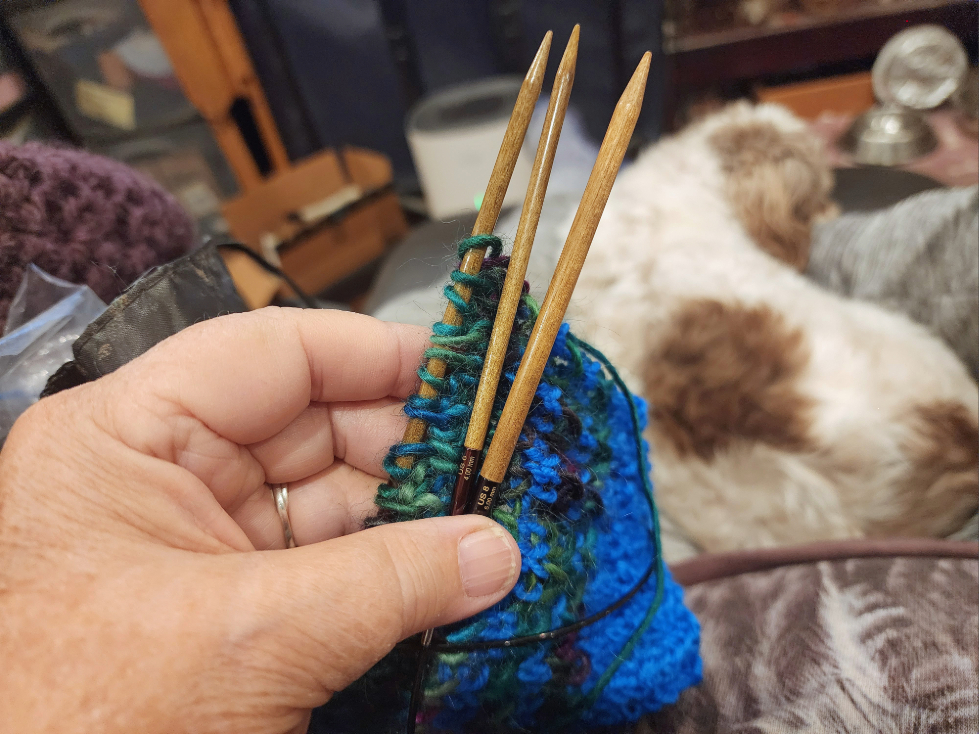
Figure 04. I used circular needles, US 6 (4mm) for knitting and US 8 (5mm) for casting on and binding off; straight needles would be just fine, too. If you use thicker yarn, you could use larger needles and save some time; if you use thinner yarn, you should use smaller needles, which will take longer to finish.
- Yarn needle
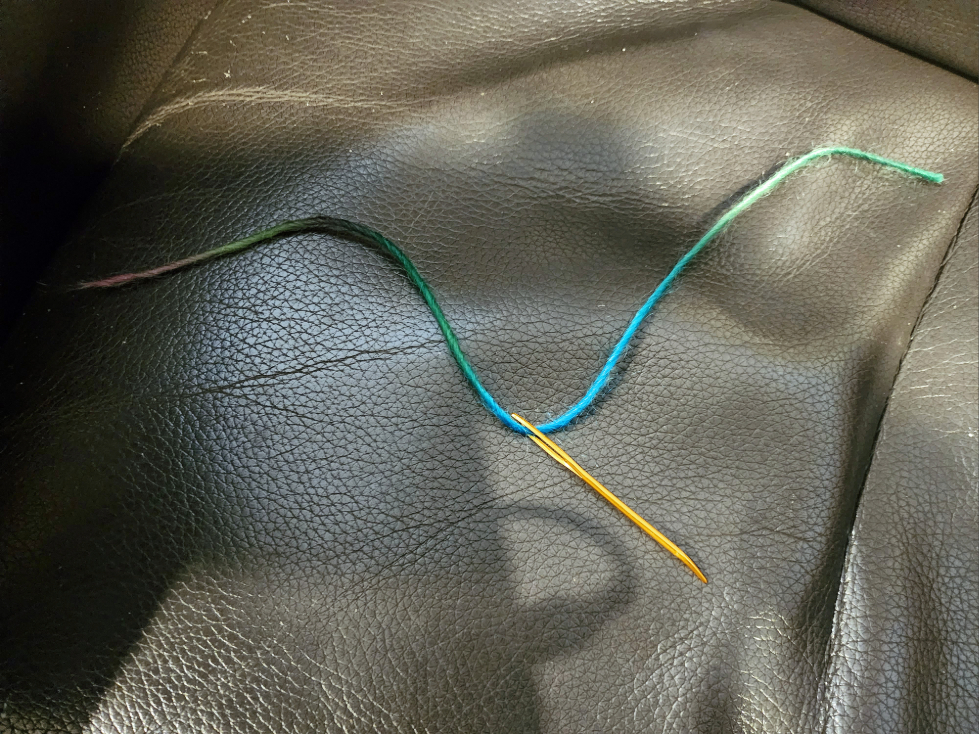
Figure 05. Yarn needles have a blunt tip to make it easy to poke through knitted fabric without snagging, and a big eye for holding thick yarn.
- Tape measure, to make it easy to measure your progress while knitting
- Scissors, for cutting the paper
- Optional: Bucket, for soaking labels off the jars.
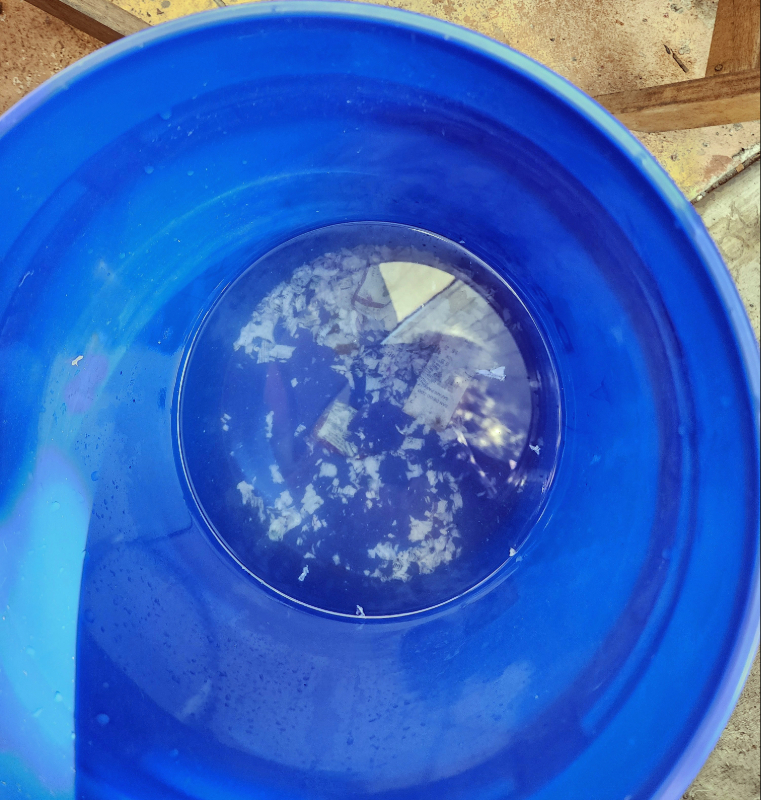
Figure 06. If you decide to remove the label from the jar, it’s easier to do if you soak the label first. If you have a bucket, it’s easier to keep your sinks free for other uses. I had time to soak the jars overnight, but if you don’t, any amount of time soaking will make removal easier.
Preliminary Steps
- Choose your jar or jars. Measure your jar’s dimensions. Your jar may differ from the jam jars I used. Make a note of your dimensions. If your jar is wider than the ones I used, you’ll need to add stitches to each row. If narrower, you’ll need to subtract stitches.
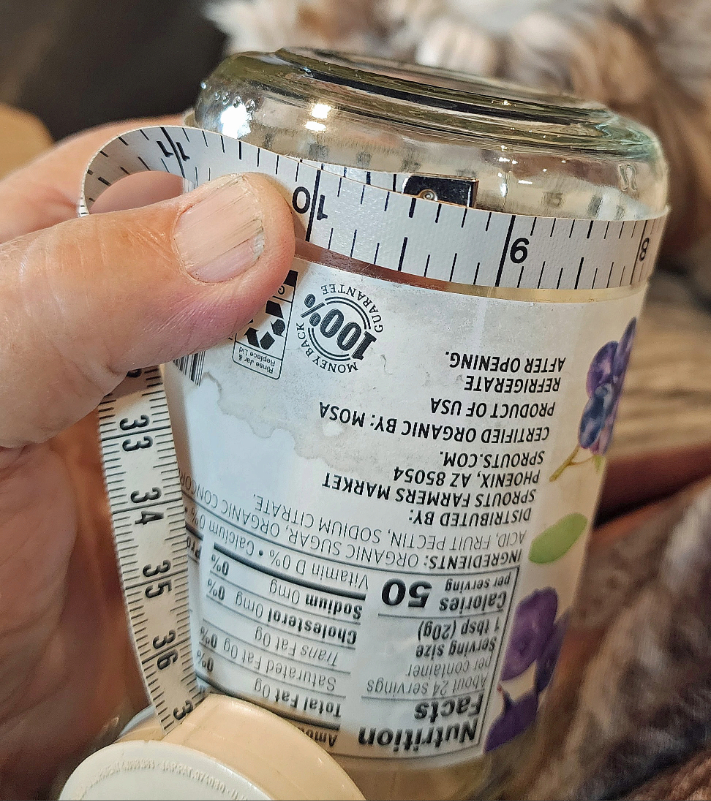


Figure 07a–f. Note the dimensions of your jar: circumference (around the sides), diameter (straight across the bottom), height (from bottom to just above where the label can be seen).

- Optional: Submerge the jars in water in your bucket (or sink), to make it easier to remove the labels. You may prefer to skip this step and simply cover the label with paper, without bothering to remove it first. Skipping this step will save you time.
- Choose your two yarns, and knit a gauge swatch, using 2×2 rib (2 knit stitches × 2 purl stitches) in the yarns and needle size you plan to use. That is, across the rows, use K2/P2 (Knit two stitches, Purl two stitches), alternating across each row. Stitch at least 10 or more rows, to be sure of your measurements.
Adapting This Pattern to Suit Your Needs
- My jars were 9.5″ around. If your jar is narrower or wider, you’ll need to adjust the width of your knitted fabric to fit your jar’s circumference.

Figure 08. I tested both the width and the needed increases on my swatch, going from 20 stitches to 42 stitches over 5 rows, then straightening out for more rows. This swatch shows my first sample; I increased too slowly, so I knitted too many rows for the increase. This is why gauge swatches are needed. You’ll find problems before you start in earnest.
- My knitted gauge was 5 stitches/inch for 2 × 2 ribs, so I wanted the row length to be 42 stitches, to reach 8 ½”, ensuring a snug fit around the jar. (8½” ×5 stitches/inch = 42, rounding to an even number).
- A 2 × 2 ribbing ensures that the cozy will be stretchy enough to snugly hold the jar while not stretching out.
- Once you knit your gauge swatch, you’ll know whether your stitching matches 5 stitches per inch in a 2×2 rib pattern.
- If you knit more stitches per inch, you’ll need to add stitches to reach the desired width.
- If you knit fewer stitches per inch, you’ll need to subtract stitches to reach the desired width.
- The bottom of the cozy must be narrower than the sides.

Figure 09. The knitted width at the bottom of the jar should be at least 1″ narrower than the width you’ll use for the sides of the jar cozy.
- Less important is knowing the gauge of your knitted rows. Mine was about 5 rows per inch; yours may differ. You can adjust for any differences by simply knitting more or fewer rows for your jar cozy.
Basic Pattern
2×2 rib: Knit 2, Purl 2, alternating, across each row, creating columns of knitted stitches interspersed with columns of purled stitches.
Getting Started: Increasing
To increase the width from 20 stitches to 42 stitches at the bottom, I increased as follows:
Cast on 20 stitches.
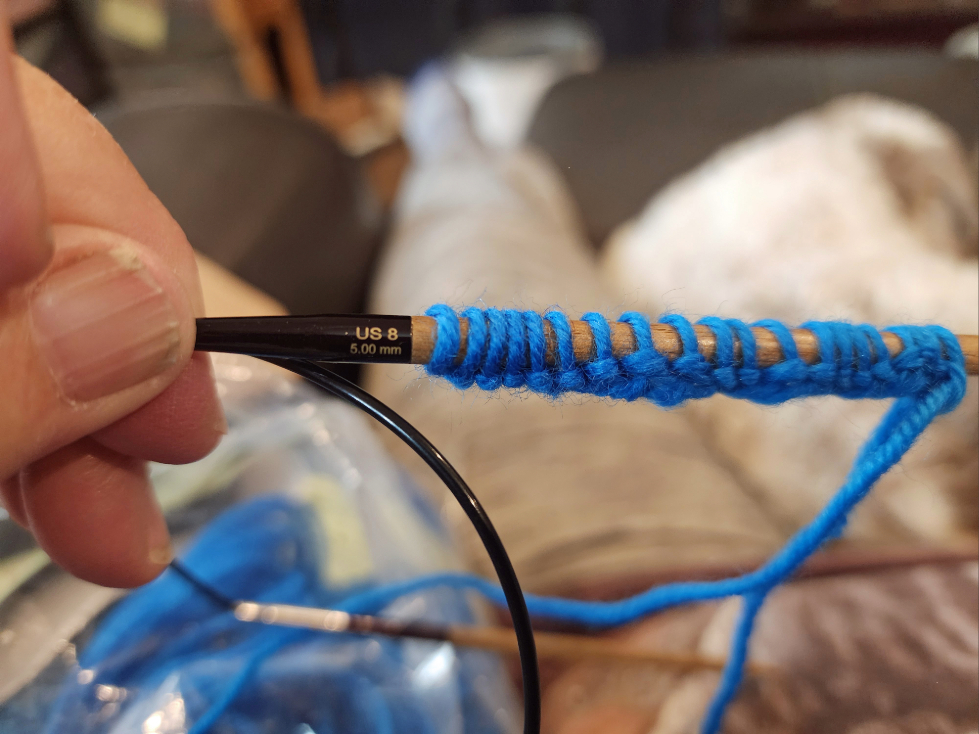
Figure 10. Using a larger knitting needle, cast 20 stitches onto your needle. (I use long-tail cast-on, but you use whatever method works for you. For this project, it would even work just to wrap 20 stitches around the needle and work from there.)
Steps for increasing from 20 to 42 stitches:
Row 1. Work the first 20 stitches.
Row 2. 20 +9 = 29.
Row 3. 29+9 = 38.
Row 4. 38+2=40.
Row 5. 40 + 2 = 42
For casting on your stitches, use knitting needles 1 size larger than the ones you’ll use to knit the cozy. On US 8/5mm, cast on 20 stitches.
Switch to the needle size you’ll use for knitting the cozy: US 6/4mm
R1. (P1/K1) ×10 (20 st)
R2. P1, (K1, Pb&f) ×9, K1 (29 st)
Pb&f: Purl 1 stitch through the back of the loop on the left-hand* needle, leaving the original stitch on the left-hand needle. Then purl 1 stitch through the front of that loop, then pull the original stitch off of the left-hand needle. Each time you do this, you add 1 stitch to the row. In this case, you add a total of 9 stitches to the row.
* These instructions assume you’re right handed, so the existing stitches are on your left-hand needle and the newly worked stitches are on your right-hand needle. If you’re left-handed, the needles will be reversed, and you’ll work your fabric from the right-hand needle onto the left-hand needle.
R3. (P2, Kb&f) ×9, P2 (38 st)
Kb&f: Knit 1 stitch through the back of the loop on the left-hand needle, leaving the original stitch on the left-hand needle. Then knit 1 stitch through the front of that loop, then pull the original stitch off of the left-hand needle.
R4. P1, Kb&f, (P2/K2) × 9, P2, Kb&f, P1. (40 st)
R5. K1, Kb&Pf, P1, (K2/P2) ×9, K2, P1, Pb&Kf, K1 (42 st)
Kb&Pf: Knit 1 stitch through the back of the loop on the left-hand needle, leaving the original stitch on the left-hand needle. Then purl 1 stitch through the front of that loop, then pull the original stitch off of the left-hand needle.
Pb&Kf: Purl 1 stitch through the back of the loop on the left-hand needle, leaving the original stitch on the left-hand needle. Then knit 1 stitch through the front of that loop, then pull the original stitch off of the left-hand needle.
Note. If you want each row to be exactly the same pattern, use a multiple of 4 stitches for each row — 40 or 44 stitches instead of 42 stitches.
These 5 rows form the bottom of the cozy.
I wanted to demarcate that row, so I reversed the pattern (Knit to Purl, Purl to Knit)
R6. (K2/P2)×10, K2
Knitting the Sides of the Cozy
Next, I switched back to the basic 2×2 ribbed pattern.
R7. (K2/P2)×10, K2
R8. (P2/K2)×10, P2
Repeat R7 & R8, alternating, to your desired length (probably ~19–21 rows more, 25–27 total).
At about row 10, test your cozy around your jar, to ensure it will wrap your jar with enough stretchiness to fit well. As needed, add or subtract stitches onto your rows.
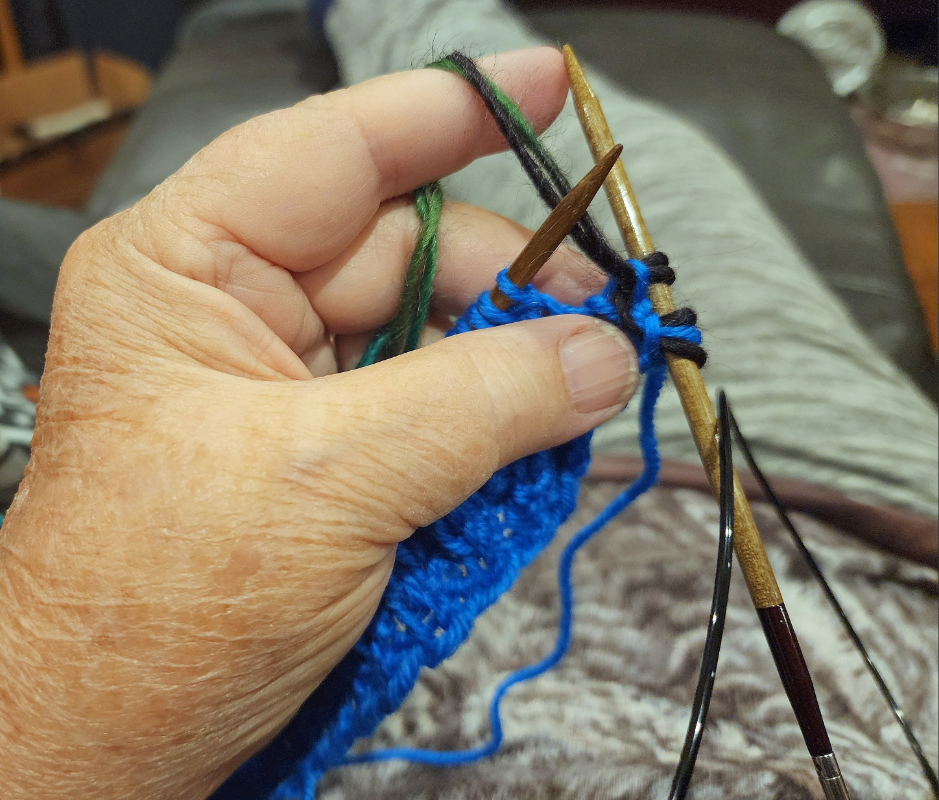
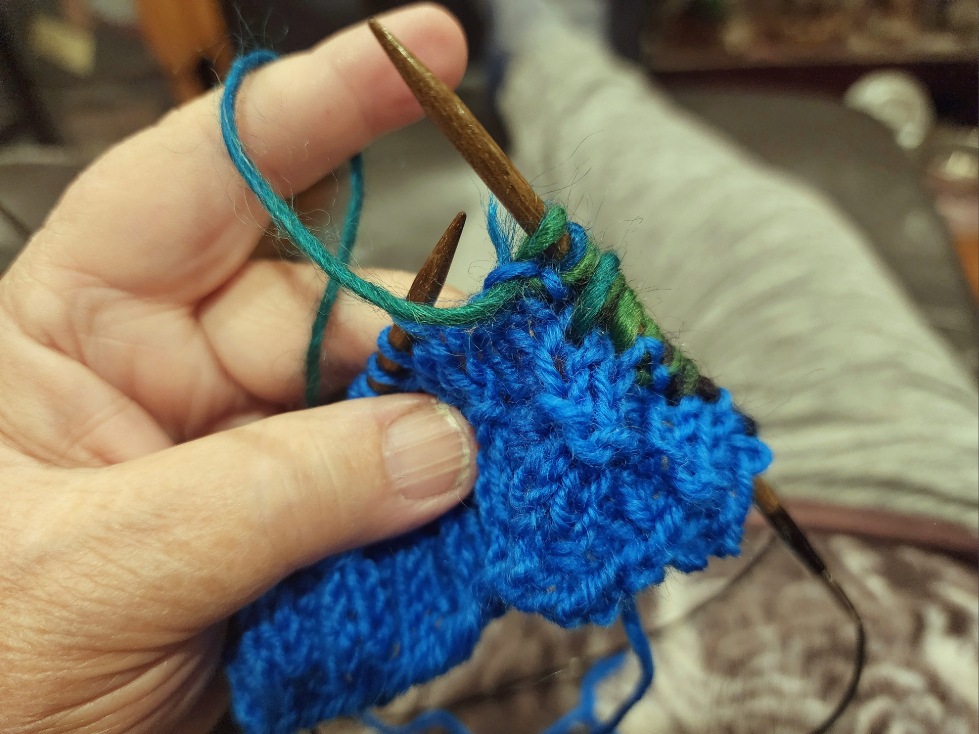
Figure 11a–b. Whenever I felt like doing so, I switched from the main yarn (blue?) to another yarn (variegated?) with the same or very similar thickness/weight. I felt like switching at Row 13. You may prefer not to switch yarns, or to switch yarns often.
Sometimes, I switched yarn colors, and sometimes I did additional 2-row reversals (K to P, P to K), such as on Rows 20 and 21. You may like doing so at different intervals, or not at all.
R21–R27. Continue basic 2×2 rib pattern.
Once you think you’ve reach the desired length, measure the length of your jar cozy.
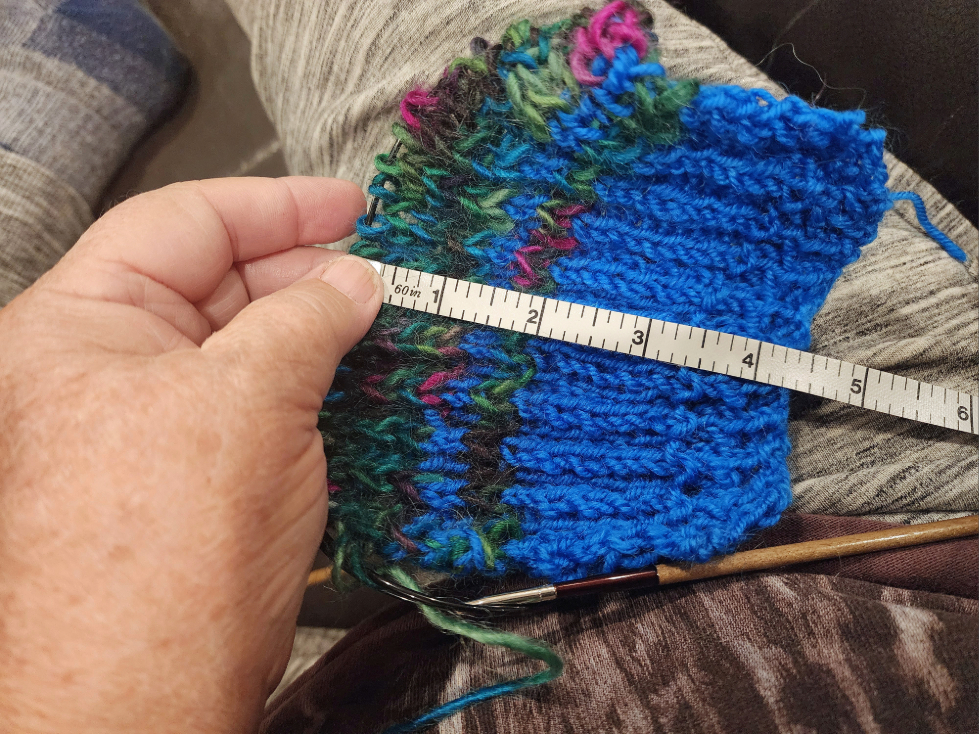
Figure 12. Before you bind off, test the length of your cozy, to be sure it’s long enough.
Once your cozy is the right length, switch back to a larger needle size, US 8/5mm.
(R28.) Bind off, in pattern (i.e., K2/P2 rib).

Figure 13. When binding off, it’s better to use extra-large needles, to avoid having the fabric tighten up at the edge. I used US 8 (5mm) for casting on and binding off and US 6 (4mm) for working the fabric. I use the work-together method of binding off, but you can use any method you like.
Work-together method of binding off: Work together the first two stitches on the left-hand needle (in the K2/P2 pattern) to turn two stitches into one stitch. Return the newly created stitch to the left-hand needle (if you’re right-handed). Then work the next two stitches together (in pattern). Return that new stitch to the left-hand needle. And so on. Keep working two stitches together and returning them to the left-hand needle until you have one stitch left. Then cut the yarn to make a tail (I leave 6″, but shorter is fine) and pull the working yarn tail through the last stitch.
Check the width of your jar cozy.

Figure 14. Compare the width of your cozy against the width of your jar. Does it wrap well, without being too tight or too loose?
- If your cozy is too wide, don’t worry. You can overlap the sides when stitching up your seam. It’s no problem.
- If your cozy is too narrow, don’t worry. You can pick up stitches from the side, add some rows, and then stitch up your seam.
- To pick up stitches, turn your knitted fabric sideways. At the side edge of your fabric, use your needle to pull yarn through the holes of the fabric onto your needle. Once you have pulled stitches through each hole, you’re ready to knit. Knit perpendicular to the original fabric until you reach the desired length — perhaps just a few rows, perhaps many.
- As an option, you may want to simulate the look of the ribbing on your added rows. If so, do a 2-row garter stitch: That is, knit across the first row, then purl across the second row. Then purl across the third row, and knit across the fourth row. Repeat this four-row pattern for the number of rows you’re adding.
- At the desired length, bind off, using a larger knitting needle.
- Measure the width against the jar again. If it fits well, you’re ready to sew up the sides.
- This inserted fabric will look a bit different, so call it a “design feature” of your cozy.
- To pick up stitches, turn your knitted fabric sideways. At the side edge of your fabric, use your needle to pull yarn through the holes of the fabric onto your needle. Once you have pulled stitches through each hole, you’re ready to knit. Knit perpendicular to the original fabric until you reach the desired length — perhaps just a few rows, perhaps many.
- If your cozy fits just right, you’re ready to stitch it up.
Stitching the Seam
- As much as possible, match the rows of your knitted cozy. This will be easier if you have some contrasting colors of yarn to match up. If you’re having trouble with this step, using a yarn needle, pull scraps of yarn through the first stitch and loosely tie it; do the same for the last stitch and for a few stitches in the middle.

Figure 15. Match the stitches on each side of your fabric, stitch to stitch, and use a yarn needle to sew them together. The text describes a method for making a nearly invisible seam, but there’s nothing wrong with you doing it whatever way works for you.
- Thread your yarn needle with your main color of yarn, about three times the length of your anticipated seam. Go through the first stitch of one side, leaving about a 3″ tail at the end. Then go through the first stitch of the other side. Turn the needle and go through the second stitch of this side, and then go through the second stitch of the first side. Continue in this manner, turning the needle back and forth as you proceed stitch by stitch. It’s not a disaster if you simply stitch round and round, from right to left (or left to right), but it creates a bulkier seam. If you do this, call it a “design feature.”
- If you need to overlap your fabric, when stitching up the seam, invert the cozy (inside-out), and use a loose running stitch down the edge of the overlapped fabric, picking up just the tops of your stitches. Invert the cozy again (inside-in), and more carefully work a running stitch, doing your best to hide your stitches — or make them bold and beautiful in a contrasting yarn — a “design feature”!
Finishing the Cozy
For any extraneous tails of yarn, use your yarn needle to weave them back into the fabric for at least 15 or so stitches, then tug slightly on the tail. With the tail pulled slightly taut, snip the tail a short distance (½ “?) from the fabric, then stretch out the fabric, and the tail will disappear into the fabric.
Prepping the Jars
- If you decided to remove the labels,
- Remove the jars from the water, and rub off the labels. For stubborn bits, use your fingernails or a butter knife.
- Dry the jars in a warm, dry place. Towel dry the inside, but the outside may be too sticky to towel.
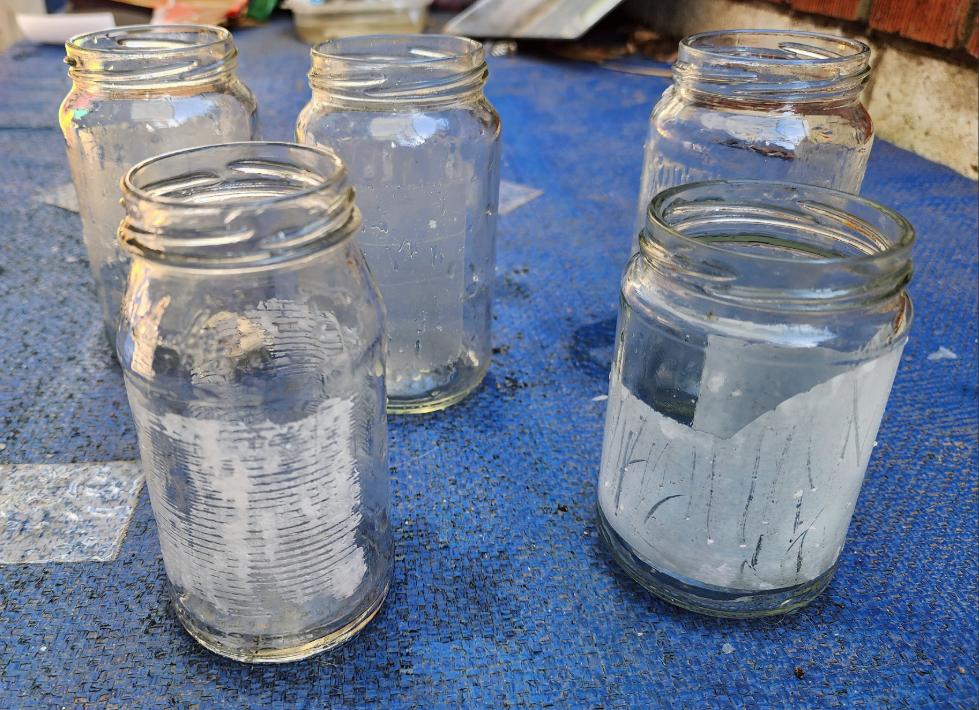
Figure 16. After you have removed the label from the jar, it will probably still be sticky, so you’ll need to cover it before slipping it into your jar cozy.
- If you decided not to remove the labels, you’re ready for the next step.

Figure 17. If you decide not to remove the label, you’re ready to cover it up. (By the way, in the Spring, the Hooded Orioles love this jelly; I’ve never tried it, but they swear by it.)
- Cut paper to
- a length that will wrap around the jar and
- a width that will cover where the label is/was.
I cut 8 ½” × 11″ typing paper in half lengthwise and folded down any excess paper to make it the correct height. You may prefer to use tissue paper, construction paper, etc., but bear in mind that it will be mostly concealed, so don’t use pricey or precious paper.
- Wrap the paper around the jar, and tape it together.
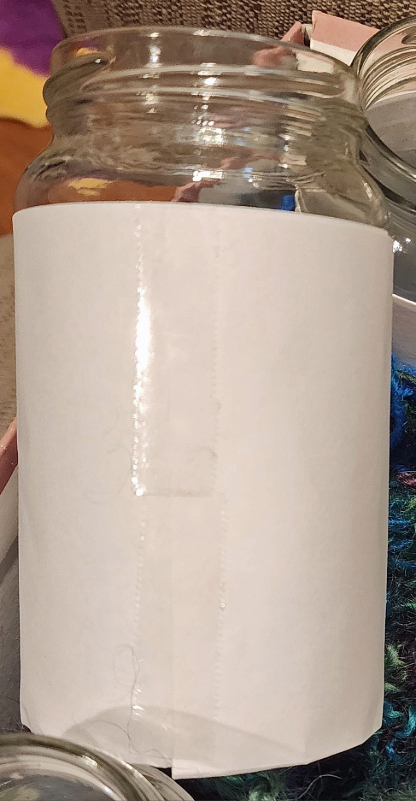
Figure 18. Wrap some paper around your jar, and tape it together.
- Slip the jar into the knitted cozy.
Fun Fillings
- I used unsalted roasted nuts (macadamias, cashews, almonds), but you may prefer salted, candied, or spiced nuts. Or how about candies, beans, soup mixes, trail mix, granola, or other dry goods? Even special flours or grains might be welcome gifts.
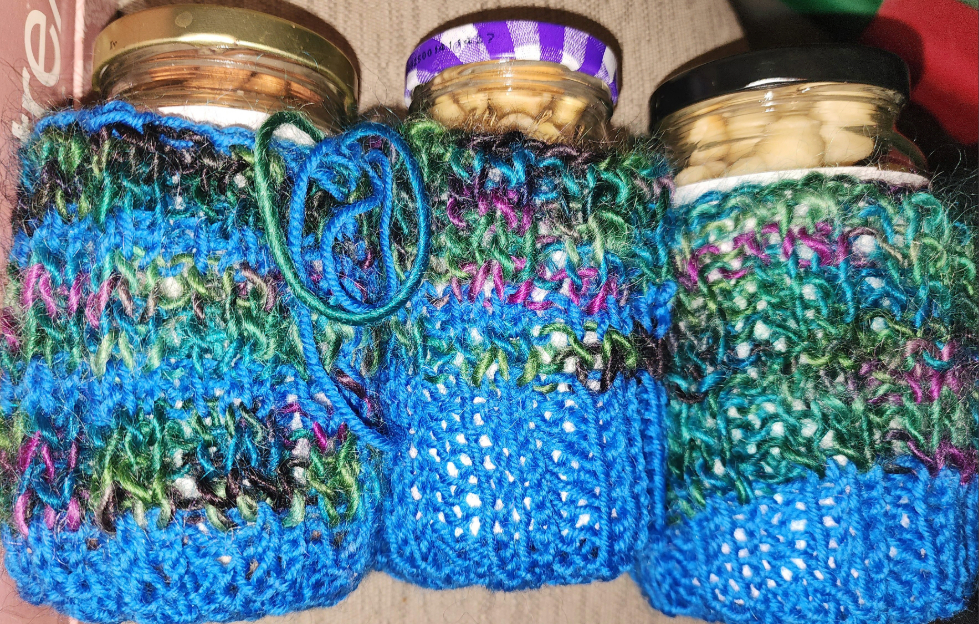
Figure 19. You can fill your jar with just about anything small enough to fit, which isn’t perishable. I used assorted nuts, but you can stuff the jar with game pieces, lingerie, miniatures, candies, or whatever else you think will be enjoyed.
- It’s probably best to avoid using liquids, e.g., sauces or soups, as these will probably need refrigeration, making your cozy less appealing.
- How about small cars or other toys? A scarf, knitted pot holder, or other small gift item? Even jewelry might be nice.
- Let your imagination run wild.
Sources


Figure 20. Because these cozies use so little yarn (½ oz. for one, 2 ½ ounces for 5), it can be fun to use some slightly pricier yarns, at least for the contrasting color.
I used these two yarns, which matched in weight but contrasted in color and texture in a way that pleased me. You might use almost any medium-weight yarn in an animal fiber, blend, or even recycled acrylic. Perhaps avoid linen, cotton, or other plant fibers; these fibers don’t bounce back once they’re stretched out.
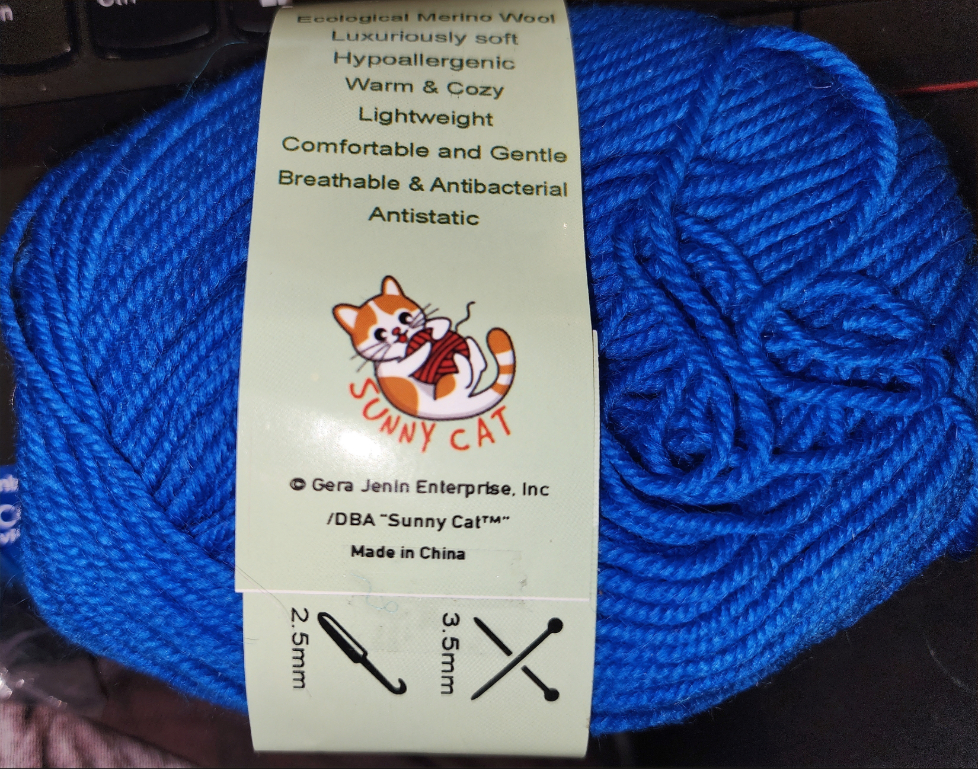

Figure 21a–b. Main yarn: SUNNY Cat Merino Wool Yarn, Royal Blue; SKU: MER-39, ItemNo: MER-210; 4-Strands Australian Merino Wool; 100% Pure Merino Wool Yarn. Length: 120 meters / 130 yards (+/-5%). Weight: 50 grams/1.75 ounces(+/-5%). Ecological Merino wool, luxuriously soft, hypoallergenic, warm & cozy, lightweight, comfortable and gentle, breathable & antibacterial, antistatic. Use US 4 (3.5mm) knitting needles
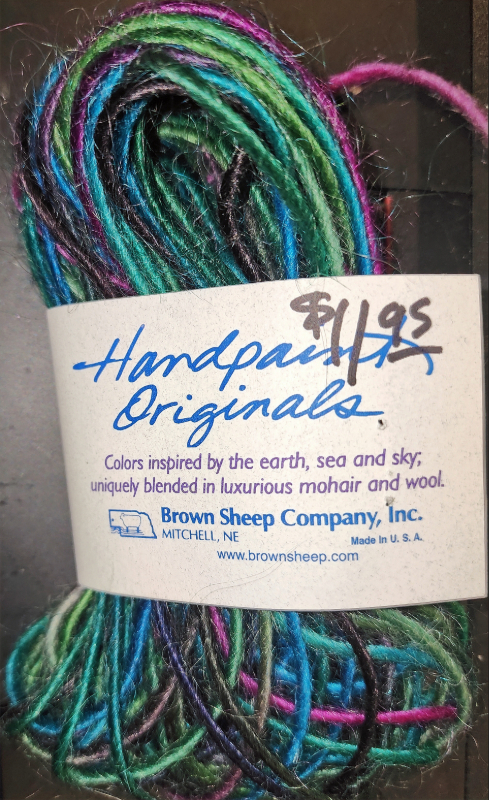
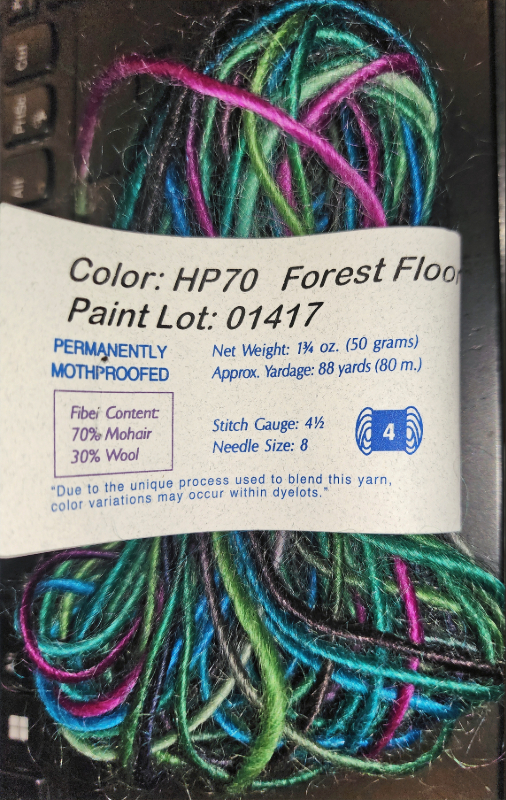
Figure 22–b. Alternative yarn: Handpaint Originals, Brown Sheep Company, Inc. Color: HP70 Forest Floor; Paint Lot: 01417; permanently mothproofed. Net Weight: 1.75 oz. (50 grams). Approx. Yardage: 88 yards (80 m.)
Text and images by Shari Dorantes Hatch, Copyright © 2025. All rights reserved.

Leave a comment